Partner Portal Guide: Contacts
The contact section of the Partner Portal allows you to list any individuals and their phone number that may be contacted upon the activation of a code condition that requires notification. Each call list individual can have their own passcode for verifying alarms. An email or text notification can also be sent instead of or in conjunction with a phone call to notify.
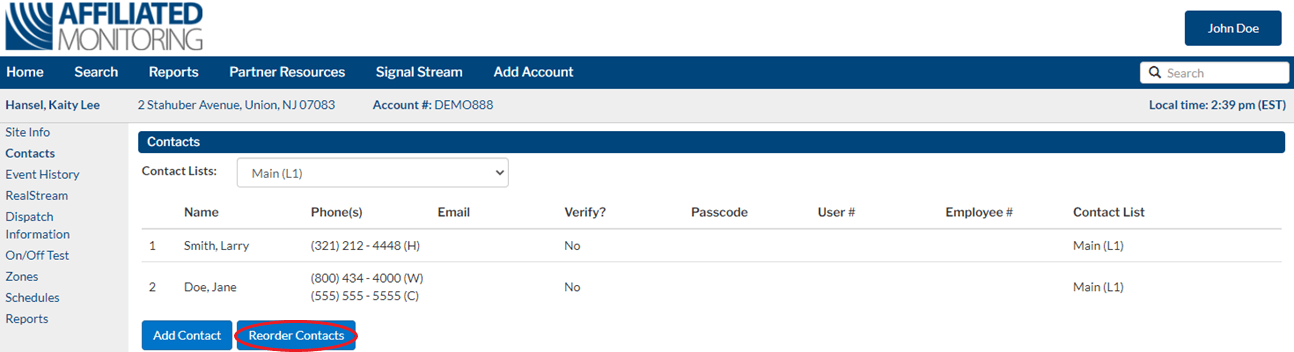
Adding a Contact

From the Contacts page, click the Add Contact button at the lower left portion of the page.

From here you will add the following information(* indicates a required field):
- First and Last Name of Contact*
- Verify?
Indicates whether or not we are using Enhanced Call Verification and calling this contact prior to dispatching on alarm events.Note: In accordance with NFPA 72, a verification call is not made prior to dispatch on Commercial Fire alarms without written authorization from the local authority having jurisdiction (AHJ). - Contact List*
Identify which call list this contact should be added to, Main (L1), Secondary (L2) or None (contacts are not required to be on a contact list).Note: If using a Secondary Call list, please ensure that the global instruction on the zones page or template include that list. - Passcode
Indicate if this contact would like their own individual passcode. This passcode must differ from the General Passcode listed on the Site Information Page and from any other contact passcodes. - Relationship
This information is not required. However, you can note the relationship this contact has to the location or customer we are monitoring. - User #
If the location has Open/Close Service, please indicate what User Number this contact was assigned. This will allow you to see the identity of the person who is opening or closing the location in the Event History on the Partner Portal. When adding or editing a contact on a site with linked systems (multiple panels reporting to the same account), you will see an additional checkbox for ‘Apply to all systems’.

Leaving this box checked (default) will mean the contact will have the same expected user number on every connected panel. If you uncheck the box, you will be prompted to enter a value for each system.
 Note: User# is not a required field. You do not have to enter a value for each system if not applicable.
 - Employee #
If needed, you may note the number assigned to each employee for this account. - SeeMyAlarm User
Indicate if this contact would like the ability to use the SeeMyAlarm app/website. This allows your customer to view account information and signal history as well as place their system on/off test. - Phones
Please provide the phone numbers that should be called during the notification process. Select the type of phone number we are calling (Ex. Mobile, Home or Work).Note: It is recommended that cell phone numbers are provided as they are the most effective way to reach your customers.- Text?
If this contact would like a text message, please select Yes from the Drop down menu. You can also specify what signals they are to be text messaged on (Ex. Emergency signals only, Trouble, Supervisory or All) using the ‘Text on’ drop-down menu at the bottom of this section. - Call Notification
Use this section to specify when the contact phone number should or should not be called. If the “Only” option is selected, the phone number is included in the call list during the time span entered in the Times field. If the “Except” option is selected, the phone number is excluded from the call list during the time span entered in the Times field.Note: This does not mean the notification will be delayed.
- Text?
- Email Addresses
If the contact would like to be emailed in addition to or in lieu of a phone call or text, please provide their email address in this section. You can designate what signals they are to be emailed on, similar to the text message notification. Set ‘Notify?’ to No if they do not want email notification but will be logging into SeeMyAlarm with their email address instead.Note: For text/email notification, please ensure that the proper event code has been noted on the zones page or indicated on your template. The event code should start with a ‘Y’ or have ‘SE’ in the description.
Once your contact information has been completely entered, click Save.
Editing a Contact
From the Contacts page on the Partner Portal, click the pencil on the right-hand side to update the specific contact’s information.
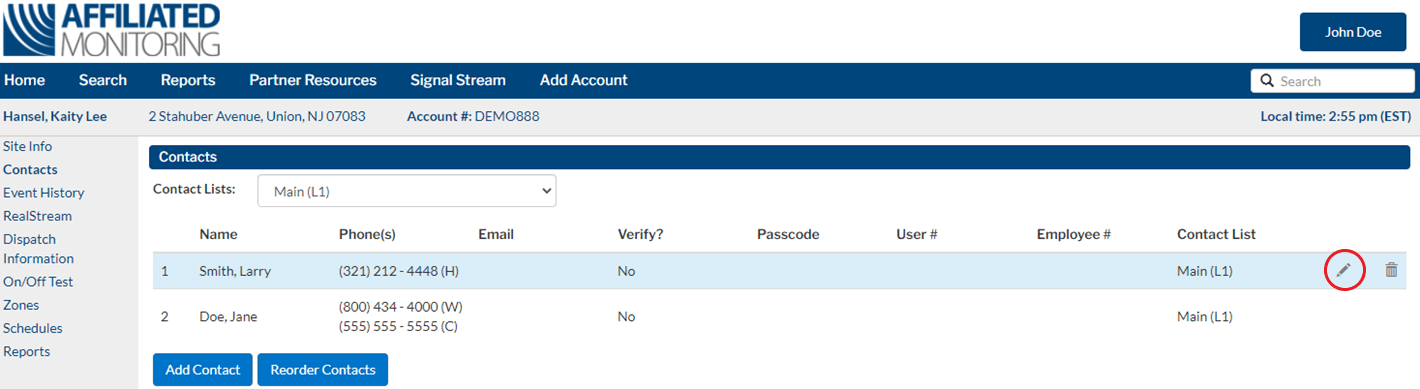
Deleting a Contact
From the Contacts page on the Partner Portal, click the trash can on the right hand side to permanently delete a specific contact. This will remove all information for the contact and any notifications they are set up to receive on this account. You will receive a warning prompt asking you to confirm the deletion of this customer. Click Delete.

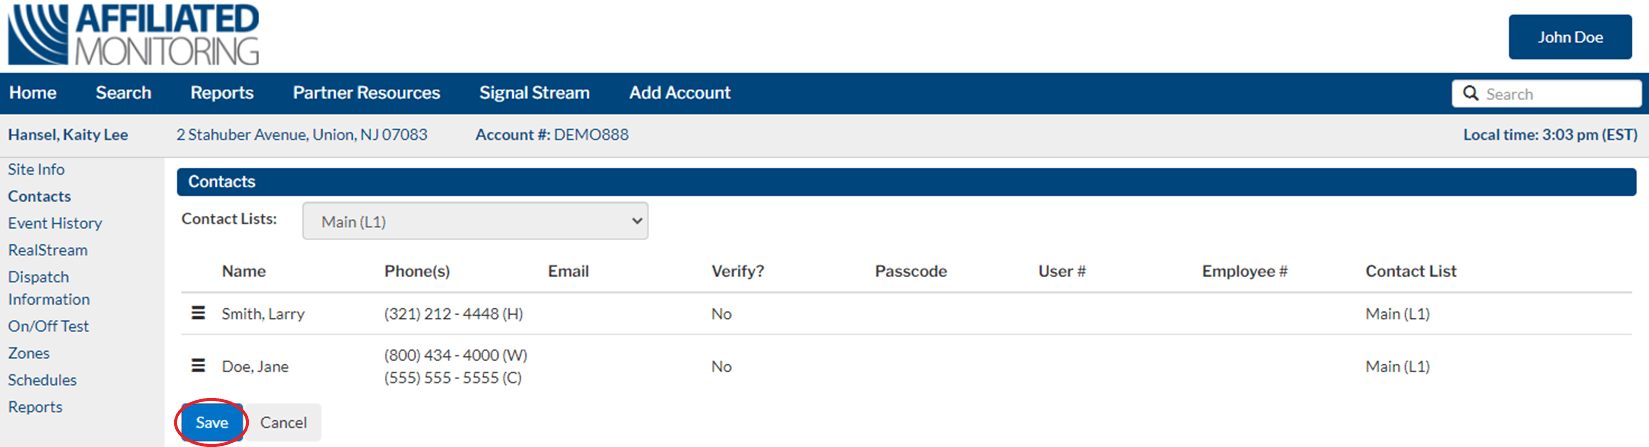
Reordering a Call List
Click the Reorder Contacts Button on the bottom of the page next to Add Contact. Once you choose the call list that you want to update you will then click ‘Reorder Contacts’ on the top right of the page.
From here you can select the Contact List you are updating from the Contact Lists drop down filter. Then drag and drop the contacts to the desired order in which they should be notified. Click Save.