Partner Portal Guide: Corp Accounts
A Corp Account is a label created in our database that allows partners to group related accounts, such as all accounts belonging to the same supermarket chain. This page allows users to manage their corp account contacts and even create new corp accounts as needed.
Users with access to this page can access it by clicking the Corp Accounts link in their top navigation bar.

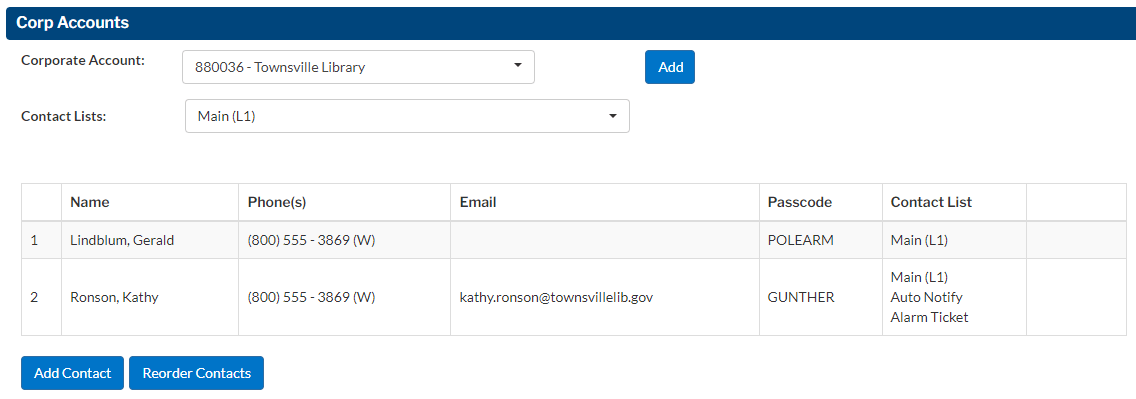
You should see a page with the Corp Accounts header, and a drop-down menu.

Looking for a Corp Account
To find one of your corp accounts, click on the Corporate Account drop-down menu, and begin typing either the corp account ID or the name of the corp account you are looking for.

When you find the desired corp account, click on it among the options, and the page will automatically display any contacts it has. At this point, this page behaves mostly like the Contacts page you have seen on accounts. However, please consult the rest of this guide regarding some of the differences.
Adding a Contact
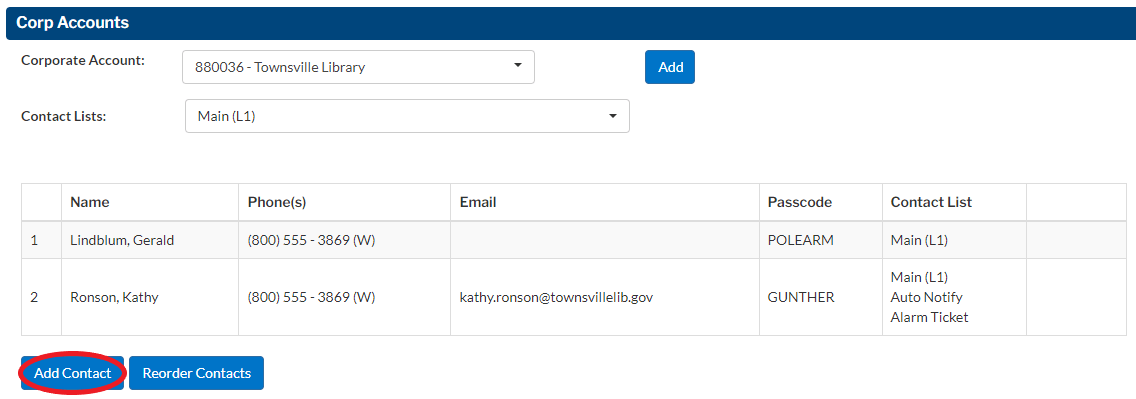
From the Contacts page, click the Add Contact button at the lower left portion of the page.
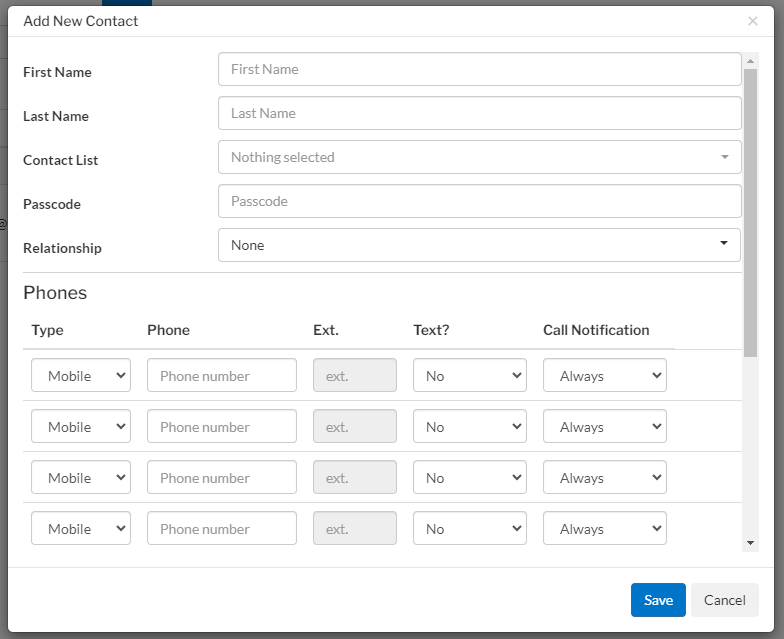
From here you will add the following information(* indicates a required field):
- First and Last Name of Contact*
- Contact List*Identify which call list this contact should be added to, Main (L1), Secondary (L2), Alternate Call List (L3), Corp Acct Only & UL Runner (L6), or None (contacts are not required to be on a contact list).
Note: If you are updating any of these lists for dispatching purposes, please ensure that the global instruction on the zones page or template include that list.
- PasscodeIndicate if this contact would like their own individual passcode. This passcode must differ from any other contact passcodes on the corp account.
- RelationshipThis information is not required. However, you can note the relationship this contact has to the corp account.
- PhonesPlease provide the phone numbers that should be called during the notification process. Select the type of phone number we are calling (e.g. Mobile, Home, or Work).
Note: It is recommended that cell phone numbers are provided as they are the most effective way to reach your customers.
- Text?If this contact would like a text message, please select Yes from the drop-down menu. You can also specify what signals they are to be text messaged on (e.g. emergency signals only, Trouble, Supervisory, or All) using the “Text on” drop-down menu at the bottom of this section.
- Call NotificationUse this section to specify when the contact phone number should or should not be called. If “Only” is selected, the phone number is included in the call list during the days and times indicated by Days, Start, and End. If “Except” is selected, the phone number is excluded from the call list during the indicated days and times.
Note: This does not mean the notification will be delayed.
- Email AddressesPlease provide any email addresses that should be notified before or after a signal is received. This section is completely optional.
- Notify?If this contact would like an email, please select Yes from the drop-down menu. You can also specify what signals they are to be text messaged on (Ex. Emergency signals only, Trouble, Supervisory or All) using the ‘Email on’ drop-down menu at the bottom of this section.
- Alarm Ticket?If this contact would like to receive an Alarm Ticket after a dispatch, select Yes from the drop-down menu.
Note: For text/email notification, please ensure that the proper event code has been noted on the zones page or indicated on your template.
Once your contact information has been completely entered, click Save.
Editing a Contact
Click the pencil on the right-hand side to update the specific contact’s information.

Deleting a Contact
Click the trash can on the right hand side to permanently delete a specific contact. This will remove all information for the contact and any notifications they are set up to receive on this account. You will receive a warning prompt asking you to confirm the deletion of this contact. Click Delete.

Reordering a Call List
Choose the call list that you want to update, and then click ‘Reorder Contacts’ on the bottom of the page next to ‘Add Contact’.
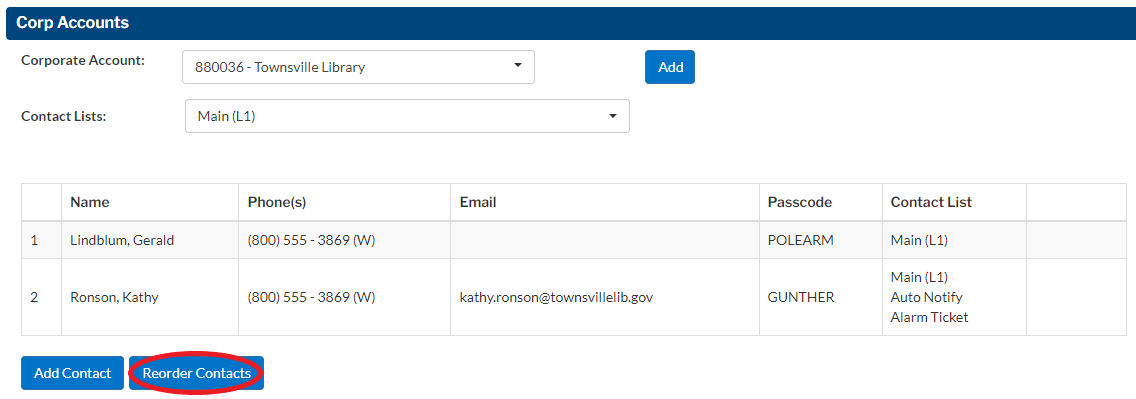
Drag and drop the contacts to the desired order in which they should be notified. Click Save when you are done, or Cancel to undo any changes you have made.

Adding a New Corp Account
The ability to create a new corp account requires a special permission. To begin, click the Add button to the right of the Corporate Account drop-down menu.

This will open the Add Corporate Account dialog.
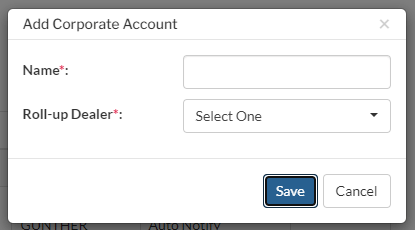
Enter the name of the new corp account you wish to create, and select the Roll-up Dealer. This is the dealer that the corp account will belong to of the ones you can access. If you only have one, just select it to move forward.
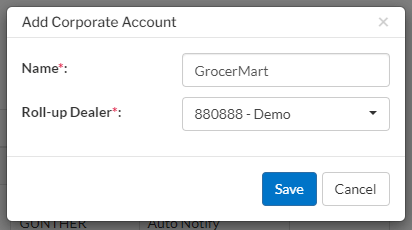
When you are done, click Save. Or click Cancel if you do not wish to proceed.

After you save, the Corp Accounts page will automatically load your new corp account, so that you may begin adding contacts to it.