Partner Portal Guide: Bulk Test
The Bulk Test page allows you to place more than one account on test at the same time without needing to open each account’s page individually.
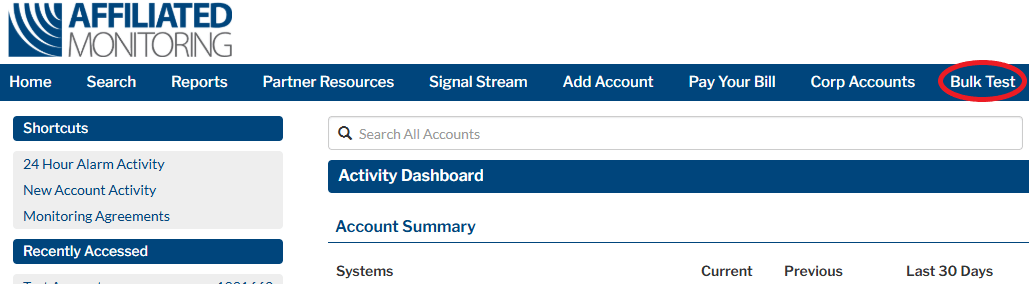
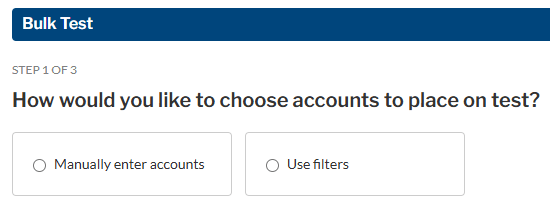
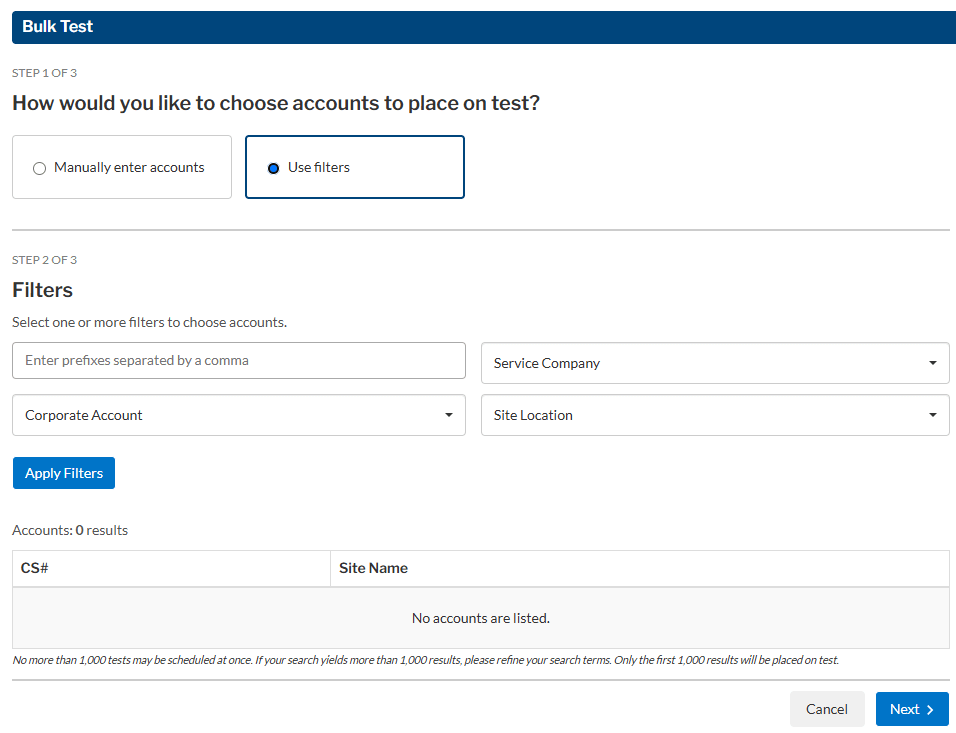
You can navigate to the Bulk Test page by clicking Bulk Test on the top navigation bar. Once the page has loaded, you will be presented with two possible options, “Manually enter accounts” or “Use filters”.
Manually enter accounts
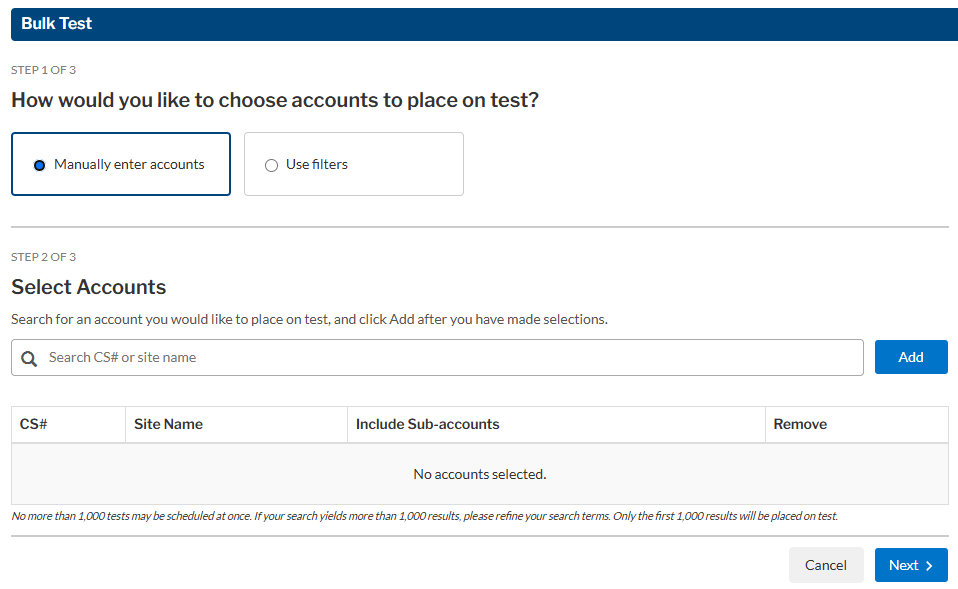
If you know the specific accounts you would like to place on test, choose “Manually enter accounts” on Step 1. This will bring you to Step 2
In the search bar, you can begin entering in the account number or name of the account.
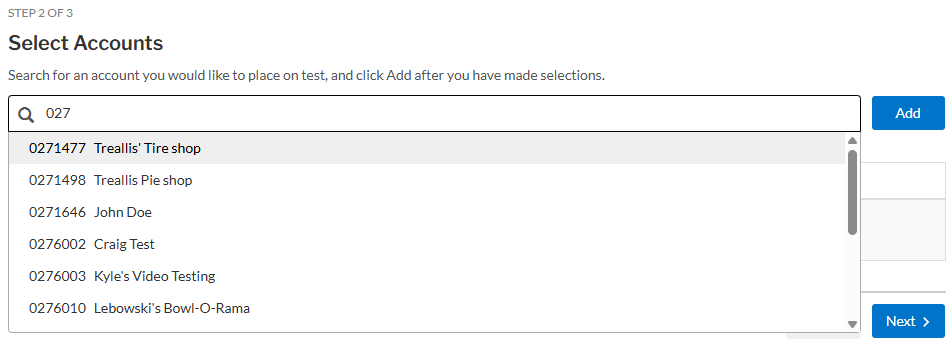
In this example, the user has begun typing the account number, and they are offered a handful of suggestions as they type. When you see the account you desire, click on it.
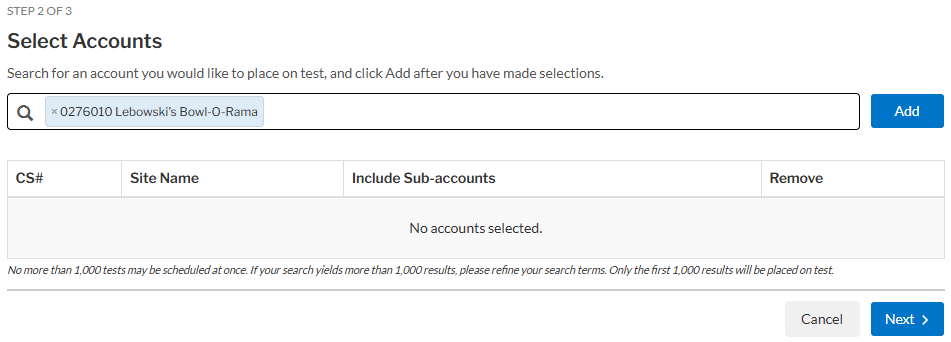
This will turn it into a tile in the search bar. If you would like to remove a selected account, click the “X” at the beginning of its tile.
You can also look for accounts by typing the site name.
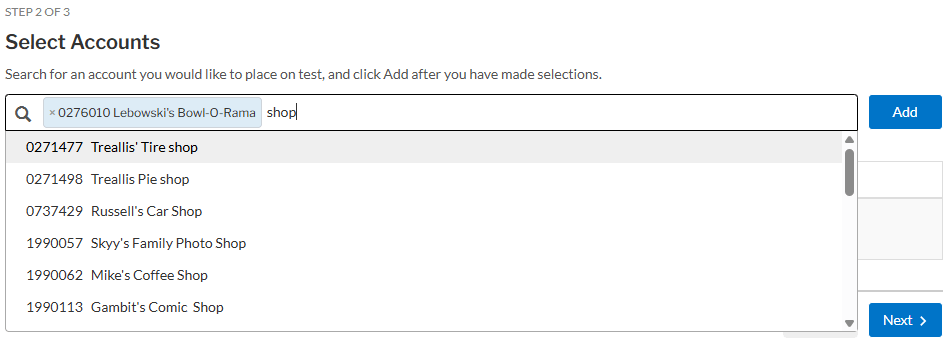
Just follow the same process to find more accounts. As you add them, you will see additional tiles.
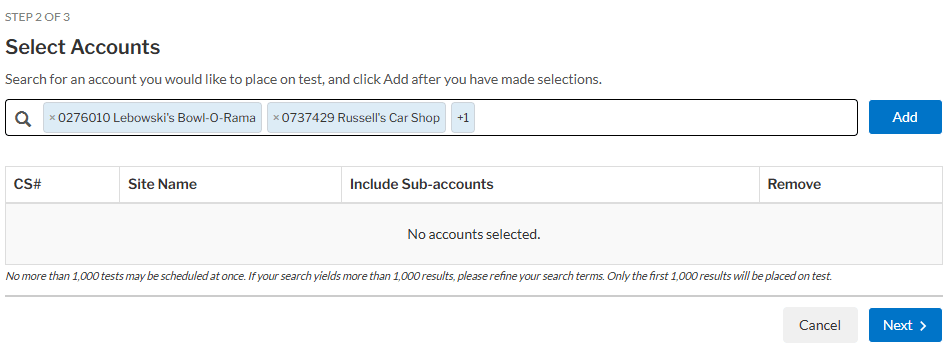
At any time, you may click the Add button on the right to drop your selections into the table below.
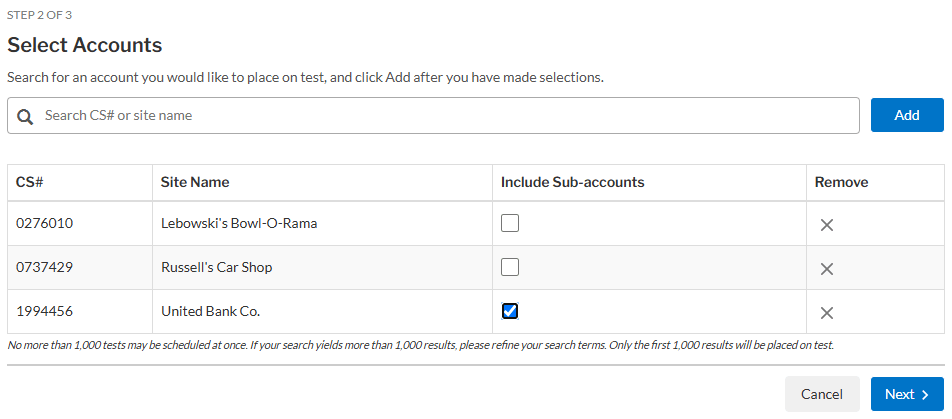
Are you trying to put an account and all of its partitions on test? Bulk Test makes that easy by letting you check “Include Sub-accounts”. When checked, the Portal will automatically look for them when the test is submitted. It is not necessary to search for and add each partition individually as long as they meet the criteria.
Keep searching and adding until you have all the accounts you wish listed in the table for review. If you would like to remove something from the list, click the “X” under the “Remove column.
When are you done making selections, click Next to proceed to Step 3.
Use filters
If you would like to place systems on test by prefix, Service Company, Corporate Account, or Site Location, choose “Use filters” on Step 1. This will bring you to Step 2.
- Prefix
Type a prefix into this box, and enter a comma to turn it into a tile. Once it becomes a tile, you may click the “X” on the tile to remove it.Note: Prefix here just refers to the leading characters in a CS#. You may type any number of characters your target accounts share in common. It does not have to be a traditional digital prefix of three numbers. - Service Company
Select any number of Service Companies from the drop-down menu. - Corporate Account
Select any number of Corporate Accounts from the drop-down menu. - Site Location
Select any number of Site Locations from the drop-down menu.Note: These options are based on your existing accounts, and the descriptions come from our database. If you would like help understanding any particular location listed, please contact Partner Support.
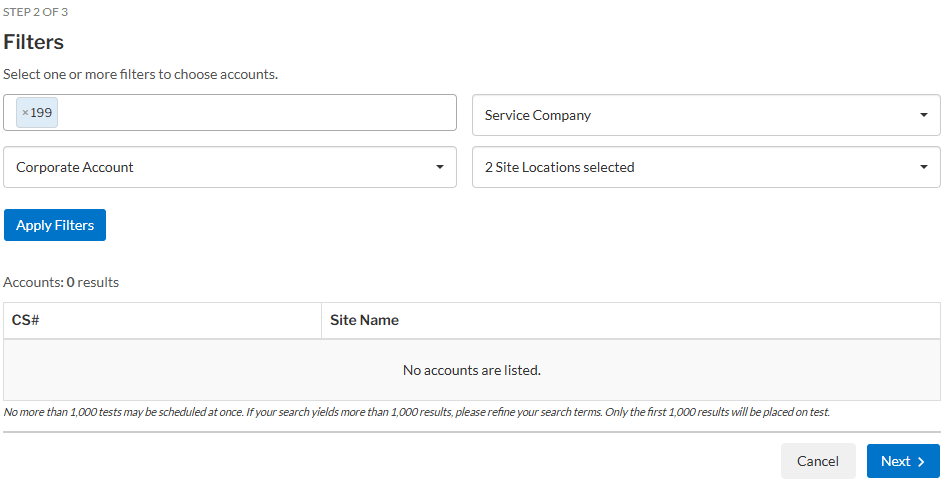
In this example, the prefix of 199 has been entered, and two Site Locations have been selected. No Service Company or Corporate Account selections have been made.
Click Apply Filters to view the list of accounts that will go on test. Only active accounts which meet all the criteria will be displayed.
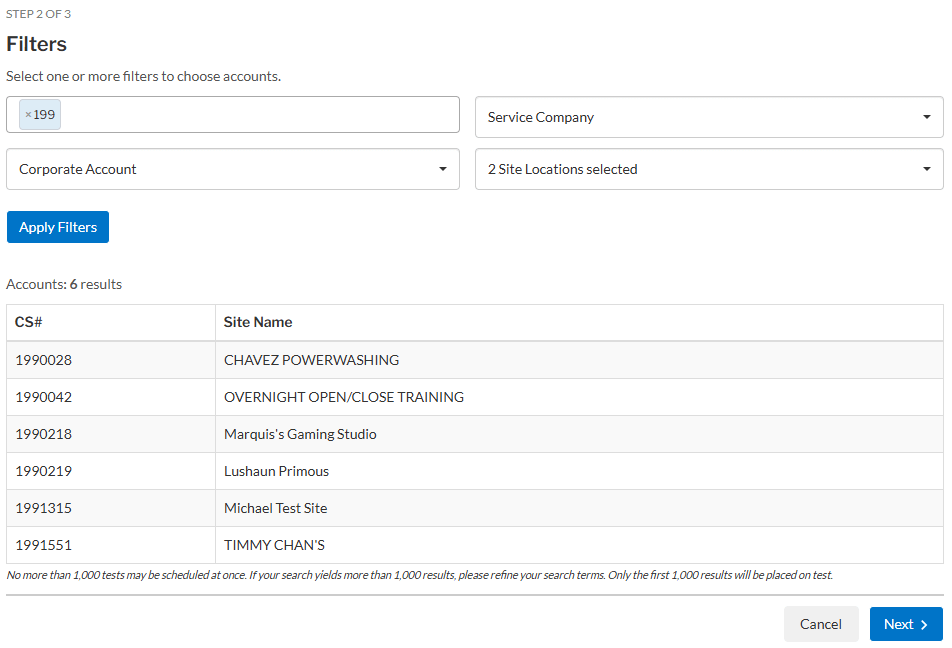
When are you done making selections, click Next to proceed to Step 3.
Set test date and service types
On Step 3 of the Bulk Test process, you will be able to choose an Effective Date and time, the Expiration Date and time, and Service Types. You may also leave a Comment.
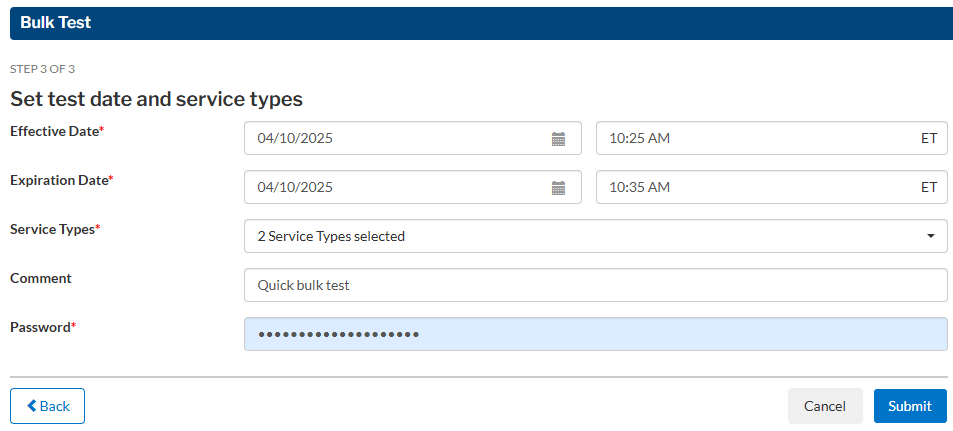
Once you have made your adjustments, enter your password and click Submit.
Confirmation
After you click Submit on Step 3, you will see a confirmation screen letting you know all the details you selected in the previous steps.
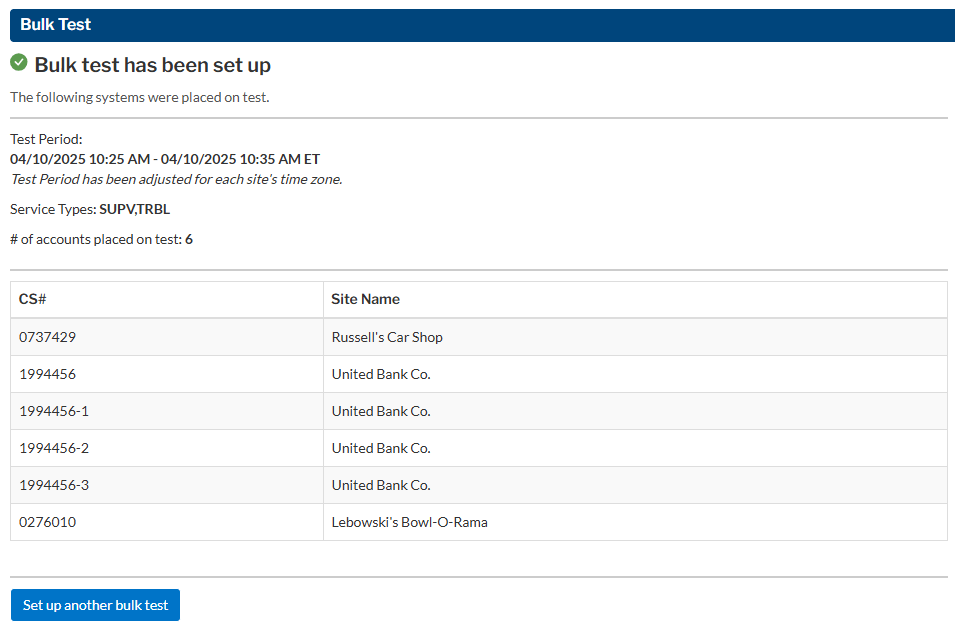
This confirmation screen is for the accounts selected in Step 2: Manually enter accounts. You can see that in addition to the three accounts selected above, the sub-accounts of United Bank Co. have also been placed on test.

This confirmation screen is for the accounts selected in Step 2: Use filters.
If you would like to create more bulk tests, click “Set up another bulk test” at the bottom of the confirmation screen.